Having access to in-house engineers have helped Metrix Group provide a genuine full-service Design Studio. They are also responsible for our proprietary Fixing Systems, Acoustic Ceiling Systems, and many internal software tools.
The perforated façade for each project has to be engineered to suit each project’s specific requirements. Below are the 6 steps that have to be addressed for every project.
PLEASE NOTE: Engineering is project-specific and contingent upon a final engineering assessment to ensure optimal performance.
The Metrix Design Studio Process
Step One
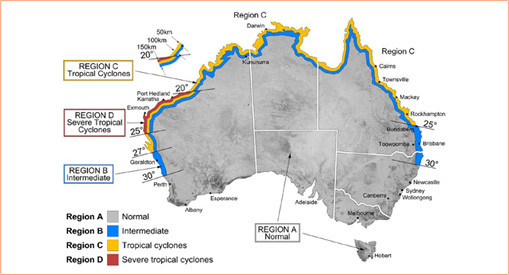
Geographic location
This determines which cyclone region applies to the project.Region A – normal Region B – intermediate Region C – tropical cyclones Region D – severe tropical cyclones

Step Two
Height of building and terrain conditions
Building height and terrain density influence the wind rating. Up to 10 metres in height, above 10 metres, low density, medium density, high density terrain.
Step Three
Application of panels
The product application influences the engineering requirements needed. Carpark cladding, building façade, bridge cladding, operative screens, balustrading, privacy screens, etc. Once the project’s specific requirements have been determined, the product type, pattern, substrate, thickness and installation system can be selected.

Step Four
Product type and pattern
Select the product type and pattern that meets the project’s design requirements.
- 2D Product including Standard, Decorative, Custom and Picture Perforation
- 3D Product including 3D Artform, Embossed and 3D Artform Image
- Acoustic Systems
Step Five
Substrate and thickness
Material type and thickness is varied to suit product type, pattern and installation system. Choose from 5 different substrates.
Step Six
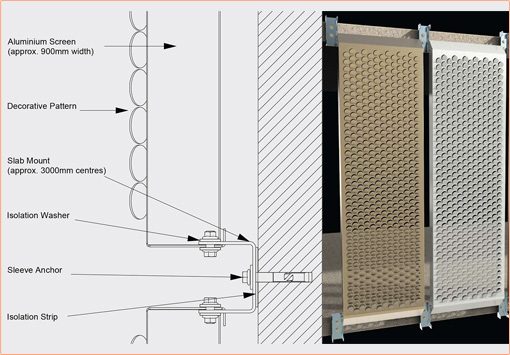
Installation Systems
The product application and project design intent determine the appropriate installation system for selection. Choose from 6 different installation systems.


